.png)
Blog Post 4: Designing a building on Autodesk Inventor
- Anthony McWilliams
- Sep 11, 2025
- 3 min read


Getting Started
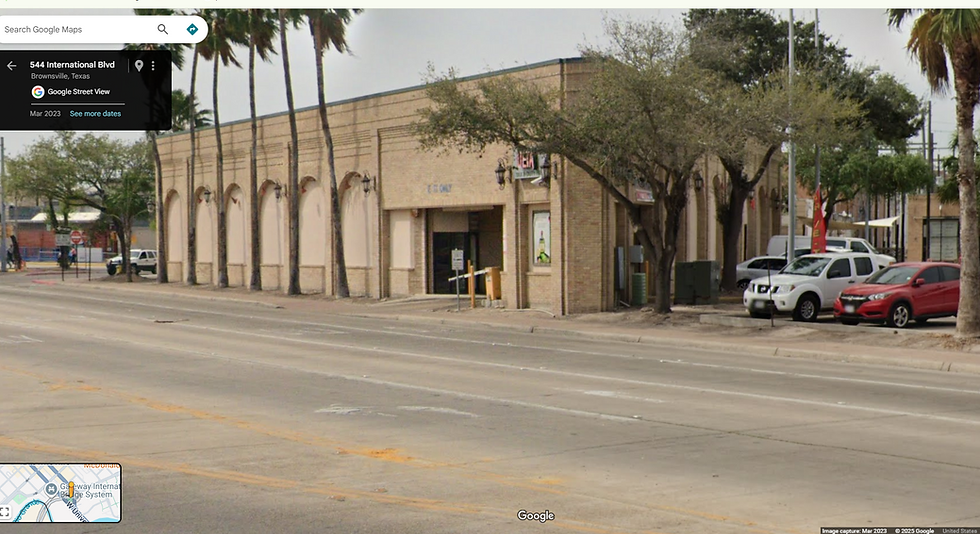
When I started this project about two years ago, I didn't understand the undertaking and the frustration I would encounter when design a building. In my previous Blog Post 3: How to design a building with limited info I described how to get the general dimensions of a building using Google Earth, i.e length, depth and height. But that's just the tip of the iceberg. What was missing were the size of windows, doors, brick, signs, etc. Some of those dimensions could not be found. I could find the overall dimensions of commercial doors but windows come is a variety of shapes and sizes, ditto on signs, etc.
Brick Size
For example, what size exterior brick should I use? If too small it wouldn't look like brick at 1:400 scale. If too large it would look exaggerated.


After some trial and error on creating realistic 3d printed exterior brick I finally came to the final size of 1.5 mm x 0.5 mm x 0.5 mm as seen below. Any issue is the size of the printing nozzle. Up until recently, I had been using the 0.4 mm nozzle. Sounds very small but it does have its limitations. For example, the 0.5 mm depth of the brick is close to the nozzle size of 0.4 mm. Means that there's a limit in resolution or detail that can be achieved. I have now been using the 0.2 mm nozzle and the difference is impressive, at least to me as probably no one else would see a difference. But it's cleaner and more detailed. The main problem with using a 0.2 mm nozzle is it can get easily clogged, which has happened on numerous occasions 🤦. Live and learn, that's how it's done. Also, you can't use certain filaments such as marble, metallic, etc that contain tiny particles to give it the appearance. It clogs almost immediately.


Also, notice in the image above the two vehicles. One was 3d printed using a 0.4 mm nozzle and the other with 0.2 mm nozzle. If you guessed the Cybertruck with 0.4 mm nozzle you are correct. You can clearly see the layers on the truck vs the beige colored truck that was printed with the 0.2 mm nozzle. The layers are harder to see making it smoother and cleaner.
0.4 mm vs 0.2 mm Nozzles
0.4 mm Nozzle
Pros
Minimal clogging.
Can use a variety of filaments such a as marble, metallic, sparkle, etc.
Still looks good at the 1:400 scale of the city.
Easier to clean after a clog.
Cons
Detail is less.
Must be careful not to design anything that is less than 0.4 mm in size.
Printing at smaller scales is near impossible, such as people that would be about 6 mm x 1 mm.
0.2 mm Nozzle
Pros
Detail is phenomenal.
Can print very small sizes such as people.
Can't see the layering as with 0.4 mm nozzle.
Cons
Easily get clogged
Can only print filaments that do not contain small particles such as marble and metallic.
Impossible to clean after a clog. I know, I have tried various methods to zero success 😔.
Next Up: Blog Post 5: Present and future of the Brownsville Downtown - Replica (Scale 1:400)


Comments